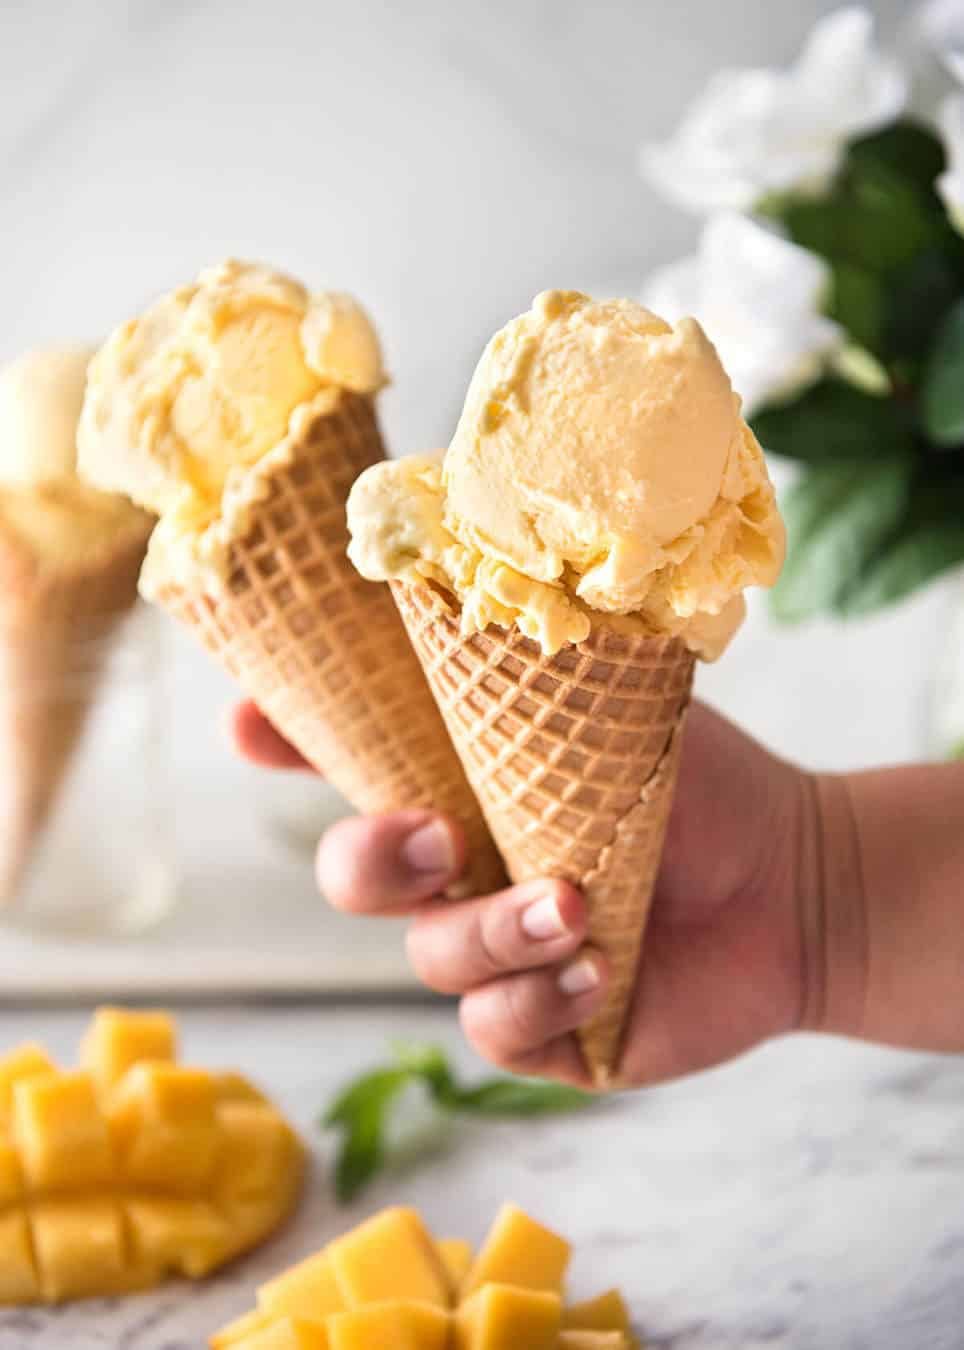
Get Creamy Homemade Mango Ice Cream Without a Machine
Imagine sinking your spoon into a scoop of velvety, golden mango ice cream, bursting with the fresh, vibrant flavor of sun-ripened mangoes. Now imagine achieving this culinary delight without the need for any fancy gadgets or a costly ice cream maker. Sounds like a dream? It's not! For anyone wondering
how to make mango ice cream that rivals store-bought tubs in creaminess and flavor, you're in for a treat. This article will guide you through two fantastic, machine-free methods that deliver incredible results, whether you crave an instant healthy fix or a decadent, scoopable classic.
Many of us have been disappointed by homemade ice cream attempts in the past – a frozen block of ice that turns into a watery puddle the moment it softens, or a crumbly, icy mess lacking that luscious texture. The good news is, those days are over! We're about to unveil the secrets to truly creamy, irresistible mango ice cream, harnessing simple ingredients and clever techniques to bypass the need for churning. Prepare to impress your taste buds and your guests with this money-can't-buy flavor, capturing the essence of real mango in a way no commercial product ever could.
Unlocking the Secret to Truly Creamy No-Churn Mango Ice Cream
The quest for perfect homemade ice cream often leads to frustration. Traditional methods rely on an ice cream machine to churn the mixture as it freezes, performing two crucial functions: it aerates the base, making it light and fluffy, and it continuously breaks up ice crystals, ensuring a smooth, creamy texture. Without this mechanical process, many homemade concoctions end up as unappetizingly icy or rock-solid blocks. This is where the magic of "no-churn" comes into play, a method dedicated to recreating that delightful scoopability without specialized equipment.
The genius behind creamy, no-churn ice cream lies in two humble, yet powerful, ingredients: heavy cream and sweetened condensed milk. Together, they form a robust foundation that elegantly sidesteps the need for churning.
- Whipped Cream for Aeration: Just like a traditional churn, whipping heavy cream to stiff peaks introduces air into the mixture. This aeration is vital for a light, fluffy texture, preventing the ice cream from becoming dense and heavy. The air pockets disrupt the formation of large ice crystals, contributing significantly to that desired creamy mouthfeel.
- Sweetened Condensed Milk for Creaminess: This is the unsung hero that acts as a natural anti-freeze and texture stabilizer. Sweetened condensed milk is a thick, viscous blend of milk and sugar. Its high sugar content dramatically lowers the freezing point of the mixture. This means the ice cream freezes at a colder temperature and more slowly, giving smaller ice crystals a chance to form – and smaller ice crystals equate to a much smoother, creamier, and more scoopable final product. Furthermore, the milk solids and fats in condensed milk contribute to the richness and body, ensuring your ice cream isn't just sweet, but truly decadent.
When combined, these two ingredients create a stable, airy base that sets beautifully in the freezer, delivering an ice cream texture that genuinely rivals those produced by machines. The result is a homemade mango ice cream that's not just scoopable, but delightfully smooth and free from the dreaded icicles.
The Core No-Churn Recipe: Ingredients & Method
Making this creamy no-churn mango ice cream is surprisingly simple, requiring minimal effort for maximum reward.
Ingredients:
- 2-3 ripe mangoes: Choose varieties like Ataulfo (Honey), Alphonso, or Haden for their vibrant color, intense sweetness, and low fiber content. Their natural sugars reduce the need for additional sweeteners.
- 2 cups (480ml) cold heavy whipping cream: Ensure it's very cold for optimal whipping.
- 1 can (14oz/397g) sweetened condensed milk: Do not confuse this with evaporated milk.
- 1 teaspoon vanilla extract (optional): Enhances overall flavor without overpowering the mango.
- Pinch of salt (optional): Balances sweetness and brightens flavors.
Method (Step-by-Step):
- Prepare the Mangoes: Peel your ripe mangoes and carefully cut the flesh away from the pit. Puree about 1.5 cups of the mango flesh in a food processor or blender until completely smooth. For an extra pop of texture and flavor, finely dice the remaining half cup of mango into small chunks. Pro Tip: Mangoes naturally contain water. To prevent any slight iciness, you can gently reduce the mango puree over low heat for 5-7 minutes until slightly thickened and some water has evaporated, then cool completely before using. However, for most mangoes, pureeing directly works wonderfully.
- Whip the Cream: In a large, chilled bowl, pour the very cold heavy whipping cream. Using an electric mixer (handheld or stand mixer with a whisk attachment), beat the cream on medium-high speed until it forms stiff peaks. This means when you lift the beaters, the cream stands up firmly without collapsing. Be careful not to over-whip, which can turn it grainy.
- Fold in Condensed Milk & Flavorings: Gently pour the sweetened condensed milk into the whipped cream. Add the vanilla extract and pinch of salt, if using. Using a spatula, *gently* fold the condensed milk into the whipped cream until just combined. The key is to maintain as much of the air in the whipped cream as possible.
- Combine with Mango Puree: Now, gently fold in the smooth mango puree. If you're using diced mango chunks, fold those in now too. Mix just until streaks of mango are beautifully swirled through the creamy base.
- Freeze: Transfer the mixture to an airtight freezer-safe container. Smooth the top with a spatula. Cover tightly and freeze for a minimum of 6-8 hours, or preferably overnight (12 hours) for the best, most scoopable texture.
Once frozen, your homemade mango ice cream is ready to be enjoyed! This method yields a truly creamy, delightful treat that tastes incredibly fresh. For more on achieving that perfect scoop, explore our comprehensive guide on
No-Churn Mango Ice Cream: The Secret to Creamy, Scoopable Treats.
When Time is of the Essence: The 5-Minute Blender Mango Ice Cream
While the no-churn method is fantastic for a classic, decadent ice cream, sometimes you just can't wait 12 hours. This is where the "5-minute" blender or food processor mango ice cream comes to the rescue! It's an instant gratification dessert that doubles as a healthier alternative, relying on the power of frozen fruit to create a soft-serve consistency without any freezing time. This method is perfect for a quick, wholesome snack or a lighter dessert, especially on a hot summer day.
Ingredients:
- 2 cups (approx. 300g) frozen mango chunks: This is the star ingredient. You can freeze fresh mango chunks yourself or buy them pre-frozen.
- 2-4 tablespoons liquid: Options include milk (dairy or non-dairy like almond, coconut, oat), orange juice, or even water. Start with less and add more if needed.
- Optional additions:
- Natural sweetener: 1-2 tablespoons of maple syrup, honey, or agave nectar if your mangoes aren't sweet enough.
- Acid: 1/2 teaspoon lime or lemon juice brightens the mango flavor.
- Creaminess boost: 1-2 tablespoons Greek yogurt, coconut cream, or a ripe banana (for a slightly different flavor profile).
Method (Step-by-Step):
- Combine Ingredients: Place the frozen mango chunks and 2 tablespoons of your chosen liquid into a high-speed blender or food processor. If adding any optional sweeteners or acid, add them now.
- Blend until Smooth: Start blending on a low speed, gradually increasing. You'll likely need to stop and scrape down the sides frequently. For blenders, use the tamper if you have one. If the mixture is too thick to blend, add liquid one tablespoon at a time until it comes together. The goal is a thick, creamy, soft-serve consistency. Avoid over-blending, which can melt the mango.
- Serve Immediately: Scoop into bowls and enjoy your instant, healthy mango ice cream! It's best eaten right away, as it will harden significantly if refrozen (though it can be re-blended if needed).
This method is incredibly versatile. For a deeper dive into this quick and healthy option, be sure to check out our article on
Whip Up 5-Minute Healthy Mango Ice Cream in Your Blender.
Mastering the Mango: Tips for Perfect Flavor and Texture
The success of any mango ice cream, whether no-churn or instant, hinges on the quality of your mangoes and a few key techniques.
Choosing and Preparing Mangoes
- Ripeness is Key: Always use ripe mangoes. They should yield slightly to gentle pressure and have a sweet, fragrant aroma at the stem. Unripe mangoes will result in a less flavorful and potentially tart ice cream.
- Variety Matters: As mentioned, Ataulfo, Alphonso, or Haden mangoes are excellent choices for their sweetness, low fiber, and vibrant color. If using a more fibrous variety, ensure your puree is extra smooth to avoid stringy bits.
- Pureeing vs. Chunks: For the creamiest no-churn result, a smooth puree is essential. Adding small diced chunks can provide a pleasant textural contrast, but ensure they are small enough not to become icy nuggets.
Troubleshooting Your No-Churn Ice Cream
- Why is it Icy? If your no-churn ice cream is icy, it's often due to too much water content or not enough aeration.
- Ensure your mango puree is concentrated (either naturally thick or slightly reduced on the stove).
- Whip your heavy cream to stiff peaks – this incorporates crucial air.
- Make sure you're using *sweetened* condensed milk, not just regular condensed milk or evaporated milk. The sugar content is vital for preventing large ice crystals.
- Why is it Too Soft or Doesn't Set?
- It likely needs more freezing time. Different freezers vary in temperature, so some might take longer than 12 hours.
- Ensure your freezer is cold enough (ideally 0°F / -18°C or below).
- If you added too much liquid (e.g., from very watery mangoes or extra add-ins), it might struggle to firm up.
Elevating Your Mango Ice Cream with Add-ins and Variations
The beauty of homemade ice cream is its versatility. Once you've mastered the basic mango recipe, feel free to experiment:
- Swirls: Ripple in other fruit purees like passionfruit, raspberry, or a tart lime curd for a beautiful contrast.
- Crunchy Bits: Fold in toasted coconut flakes, chopped pistachios, cashews, or even white chocolate chips for textural excitement.
- Spices: A pinch of ground cardamom, ginger, or a hint of cayenne pepper can beautifully complement mango's sweetness.
- Tropical Boost: Add a splash of coconut rum (use sparingly as alcohol lowers the freezing point) or a teaspoon of coconut extract.
- Zesty Twist: A little lime zest folded into the base can brighten the overall flavor profile.
Don't be afraid to get creative! These additions allow you to tailor your homemade mango ice cream to your exact preferences, making each batch a unique culinary adventure.
Conclusion
Creating creamy, delicious mango ice cream at home, without the need for an expensive machine, is not just possible – it's incredibly easy and rewarding. Whether you opt for the rich, decadent no-churn method that yields a scoopable classic after a restful night in the freezer, or the lightning-fast 5-minute blender technique for an instant healthy treat, you now possess the knowledge to transform simple ingredients into extraordinary desserts. Say goodbye to icy disappointments and hello to the vibrant, tropical bliss of homemade mango ice cream. So grab those ripe mangoes, gather your ingredients, and embark on a delightful journey to sweet, frozen perfection. Your taste buds, and your summer, will thank you!